Edit the CMUARCTIC dataset
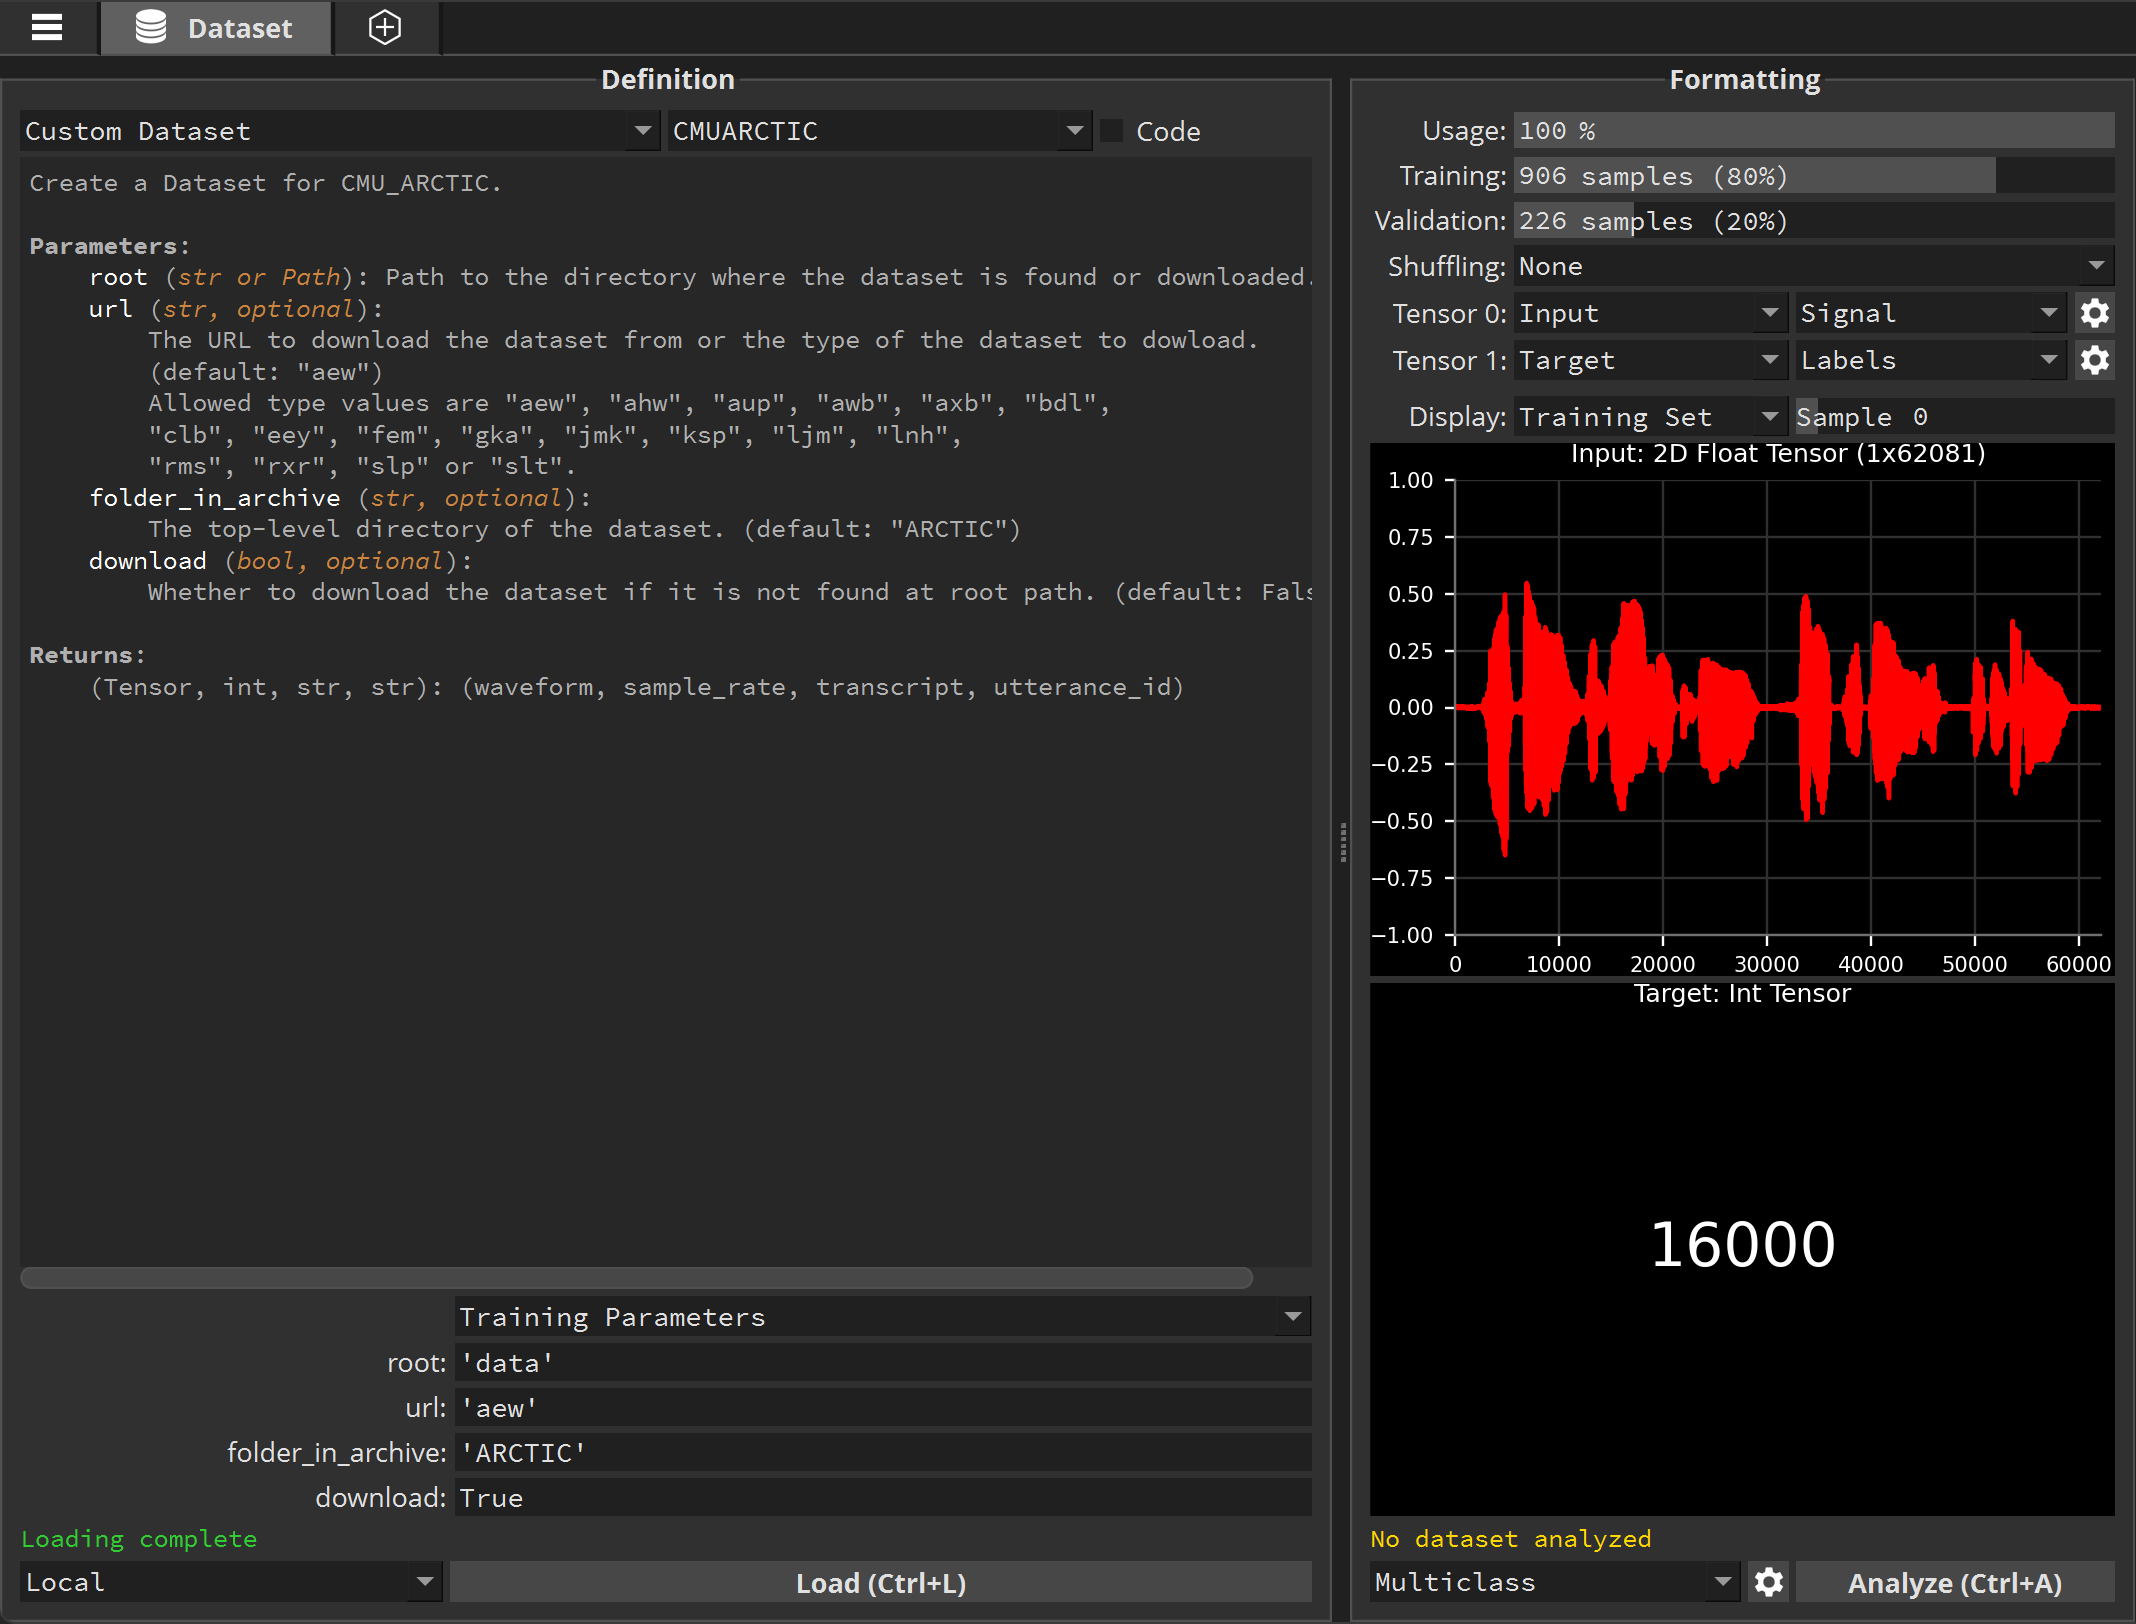
In the Dataset tab, select the torchaudio.datasets category and the CMUARCTIC dataset. This dataset is composed of audio waveforms associated with other infos.
Click Load. If you don’t already have this dataset on your computer, it will be automatically downloaded.
Once loaded you can see audio waveform of different sizes associated with other informations:
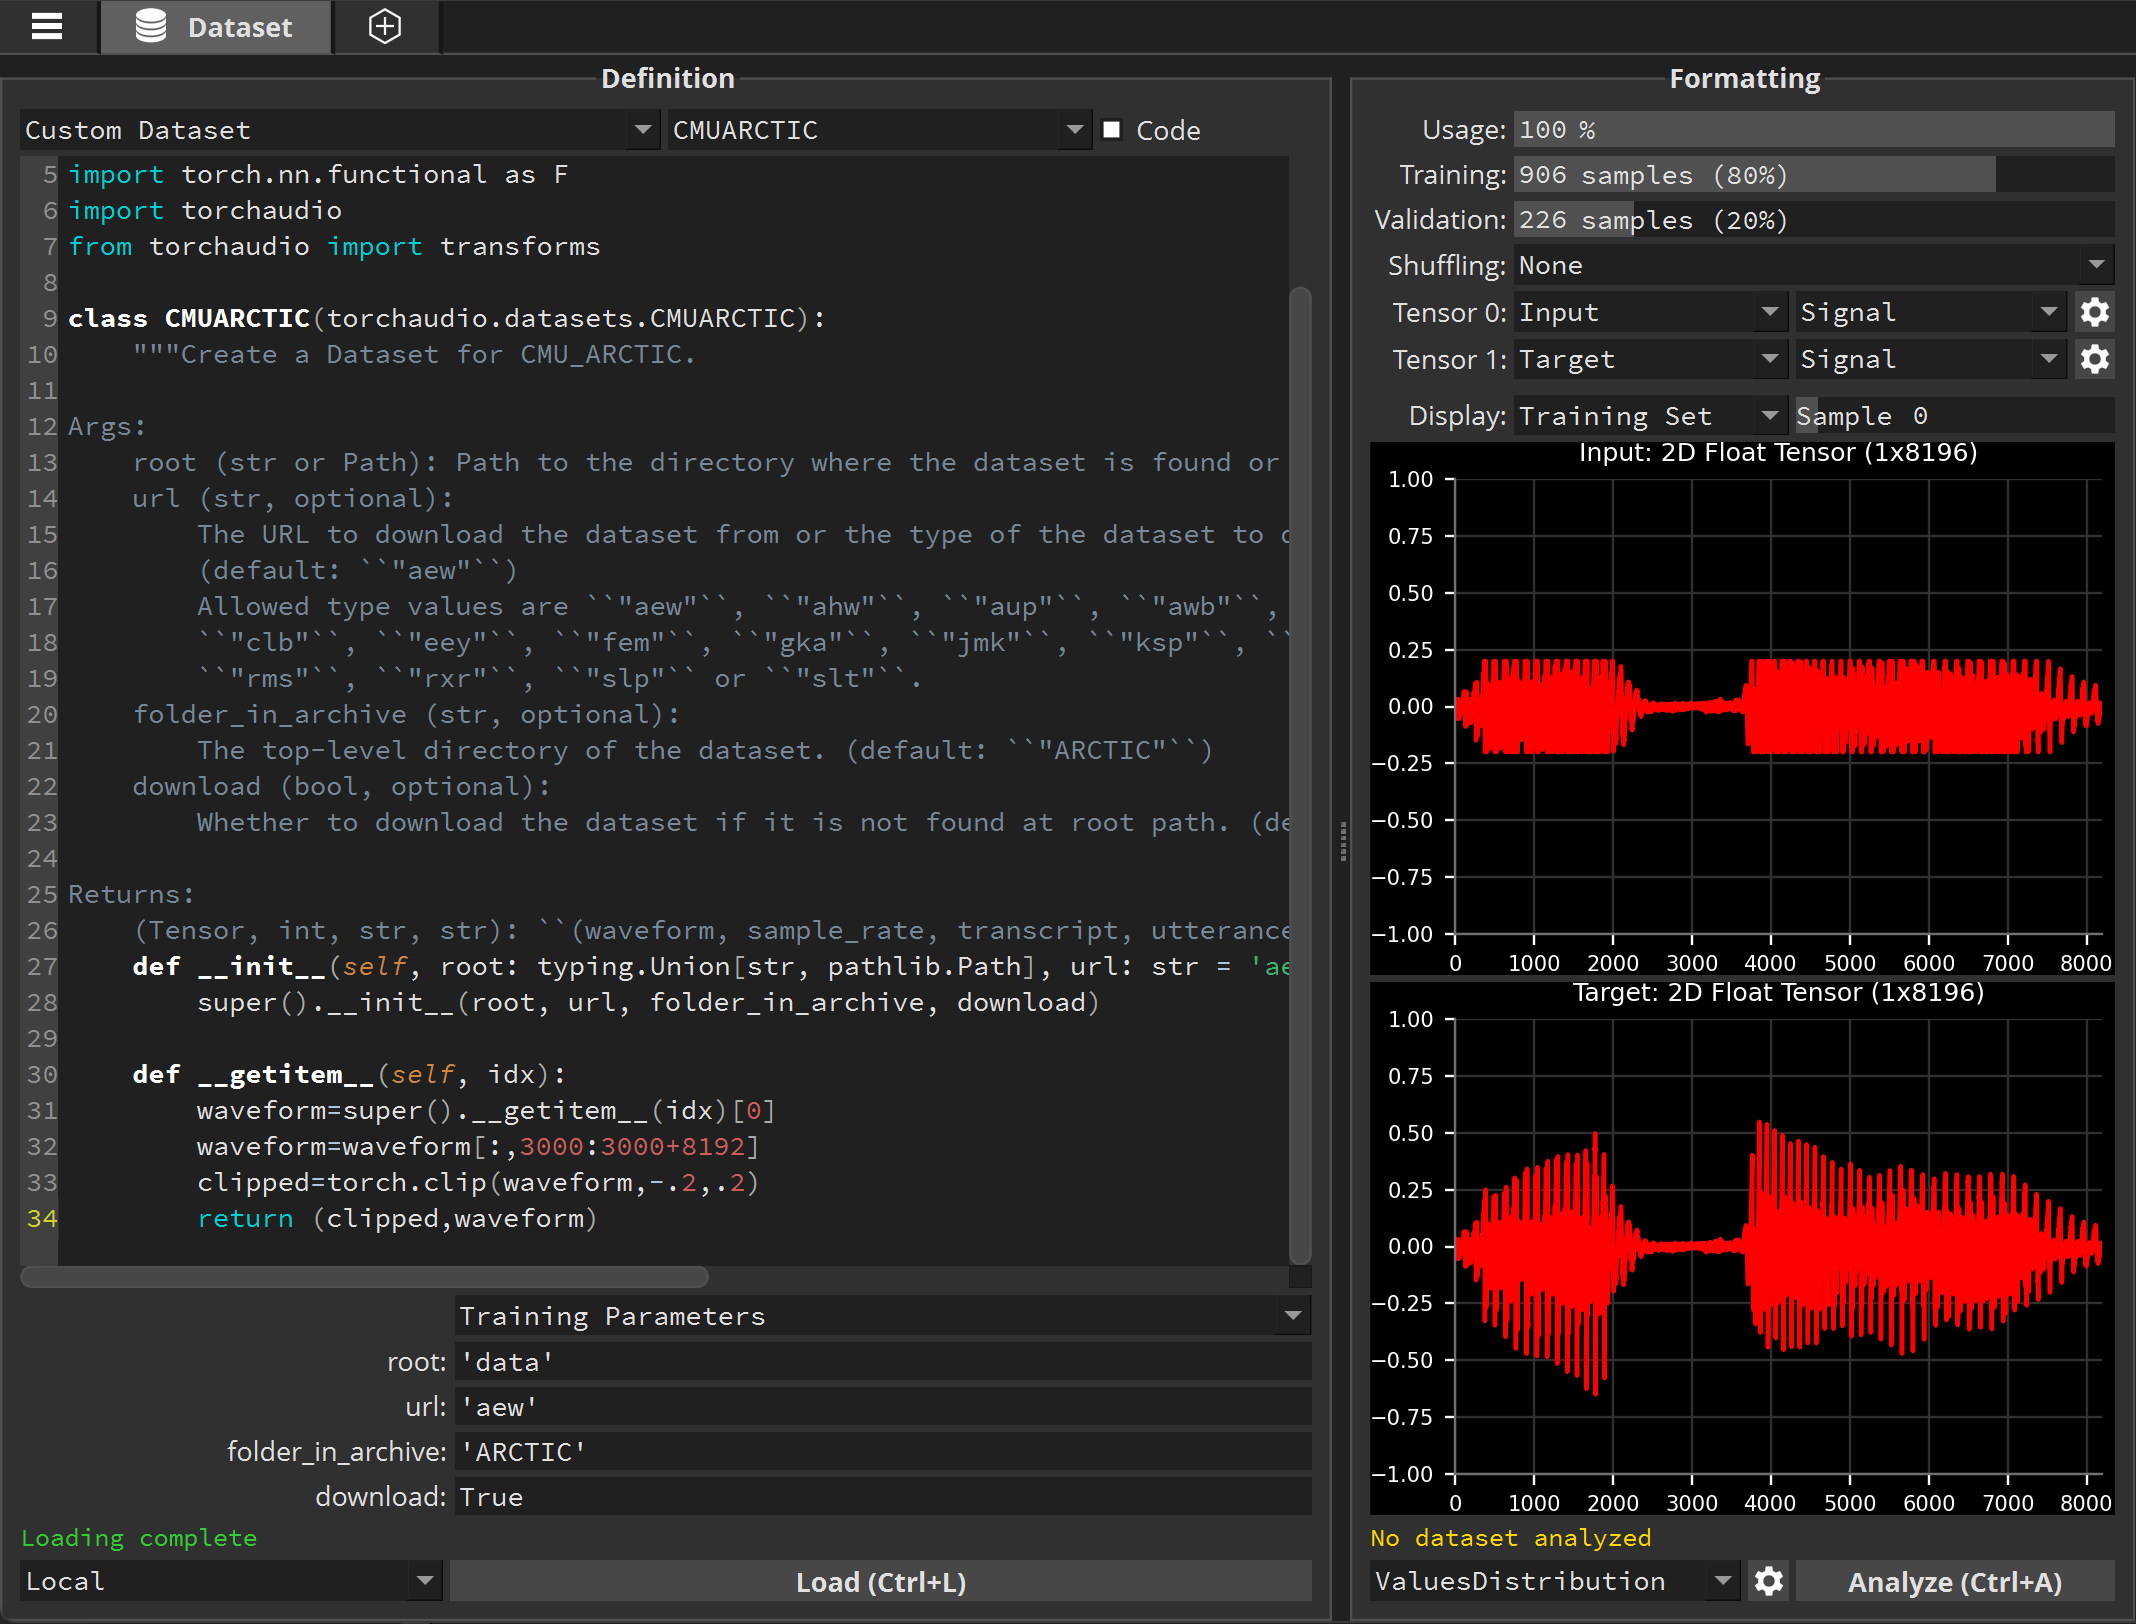
We’re going to edit this dataset to return clipped and unclipped waveforms, so that we can train a model to repair clipped audio data. Clipping occurs when the audio level of an audio recorder was not set properly, and as a result audio peaks are lost. The audio recording is then distorted.
Check the Code box at the top to reveal the source code of the dataset. At the end we’re going to add the following code:
    def __getitem__(self, idx):
        waveform=super().__getitem__(idx)[0]
        waveform=waveform[:,3000:3000+8192]
        clipped=torch.clip(waveform,-.2,.2)
        return (clipped,waveform)
This code takes only the waveform tensor from the CMUARCTIC dataset, and for each waveform retains only 8196 samples (skipping the silent first 3000 samples). It then creates a clipped version of that waveform, as if a recorder had a maximum recording threshold set at .2. And it returns both the clipped waveform and the unclipped waveform.
Click Load again to see the result:
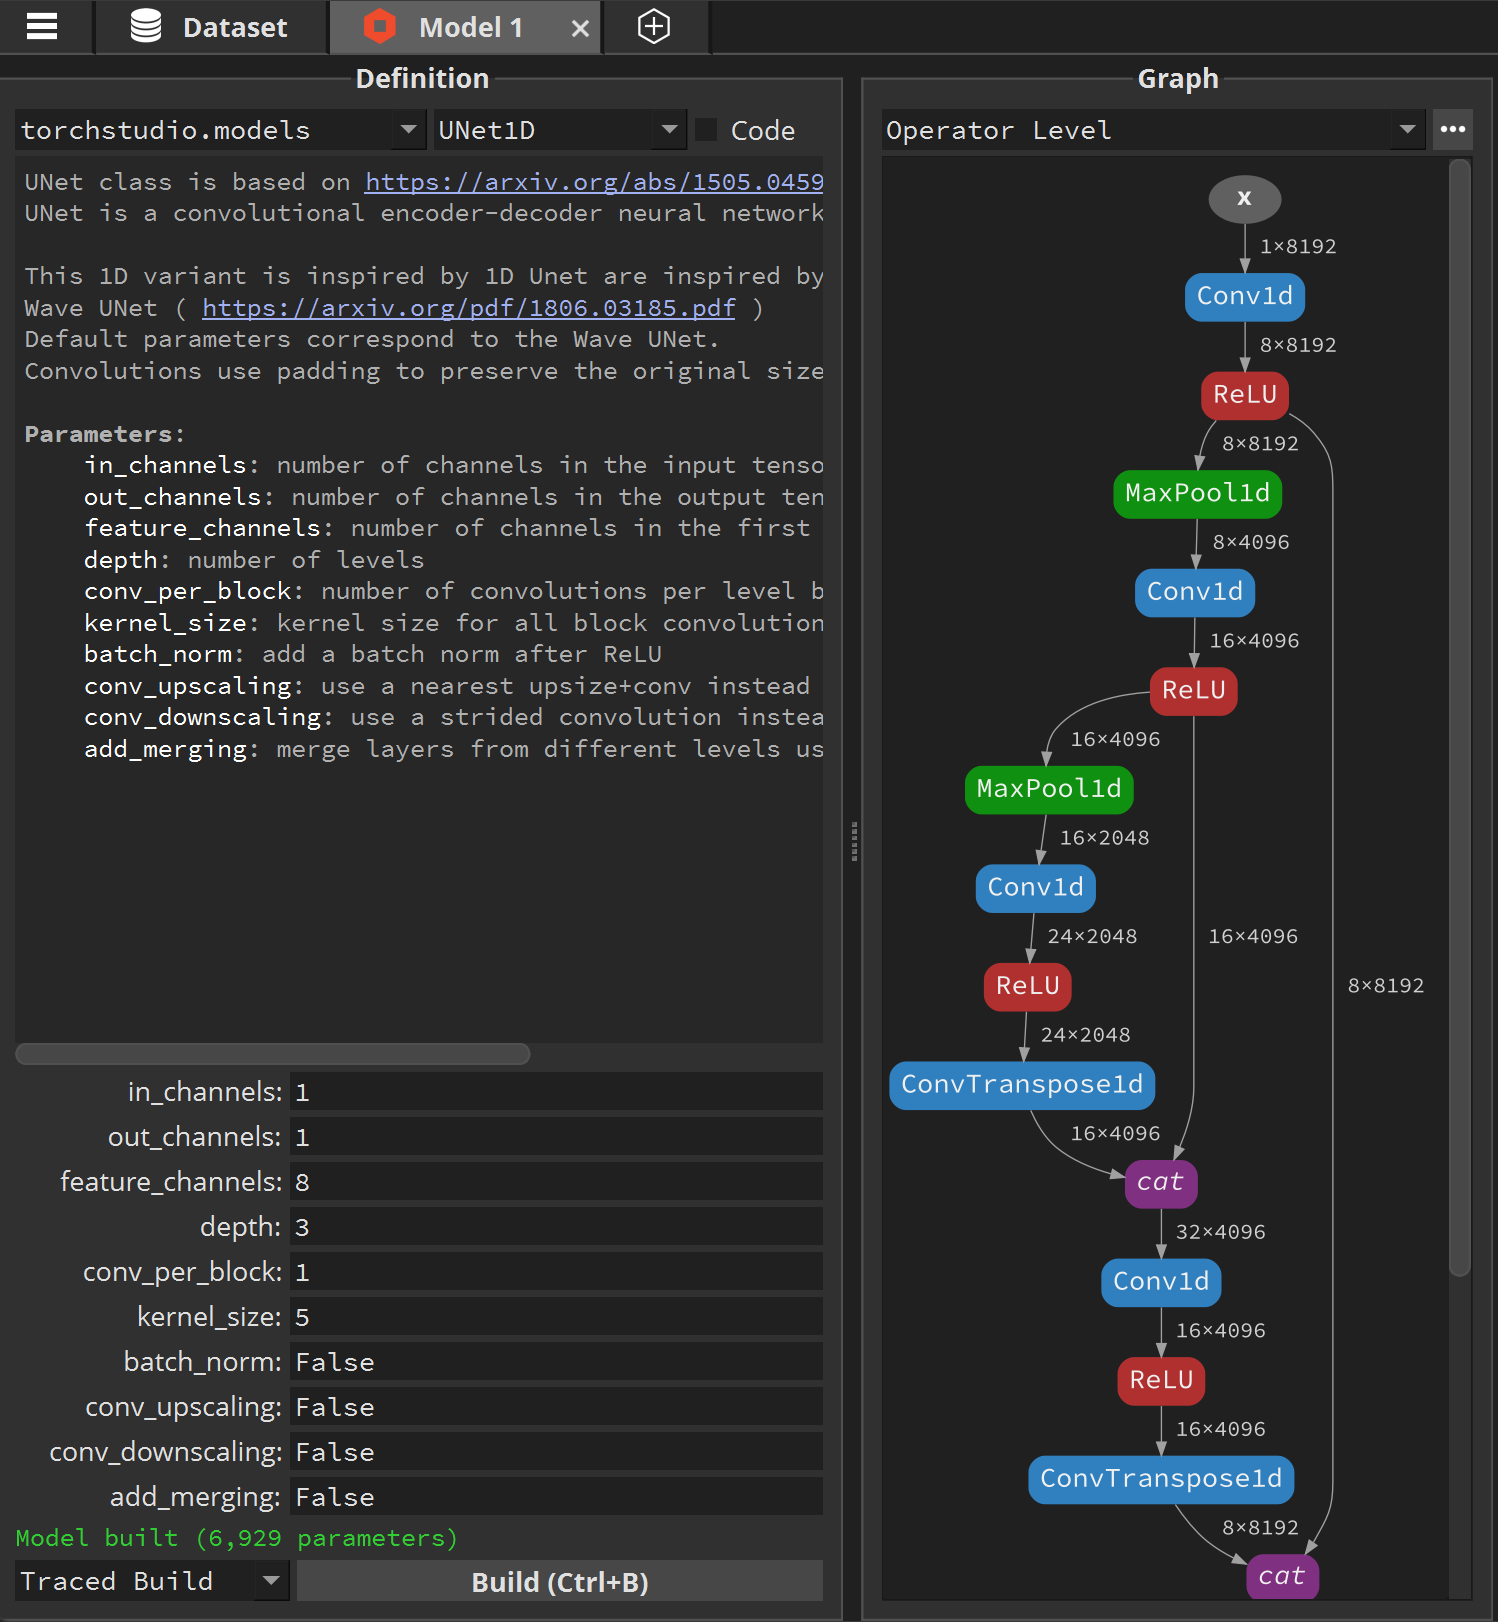
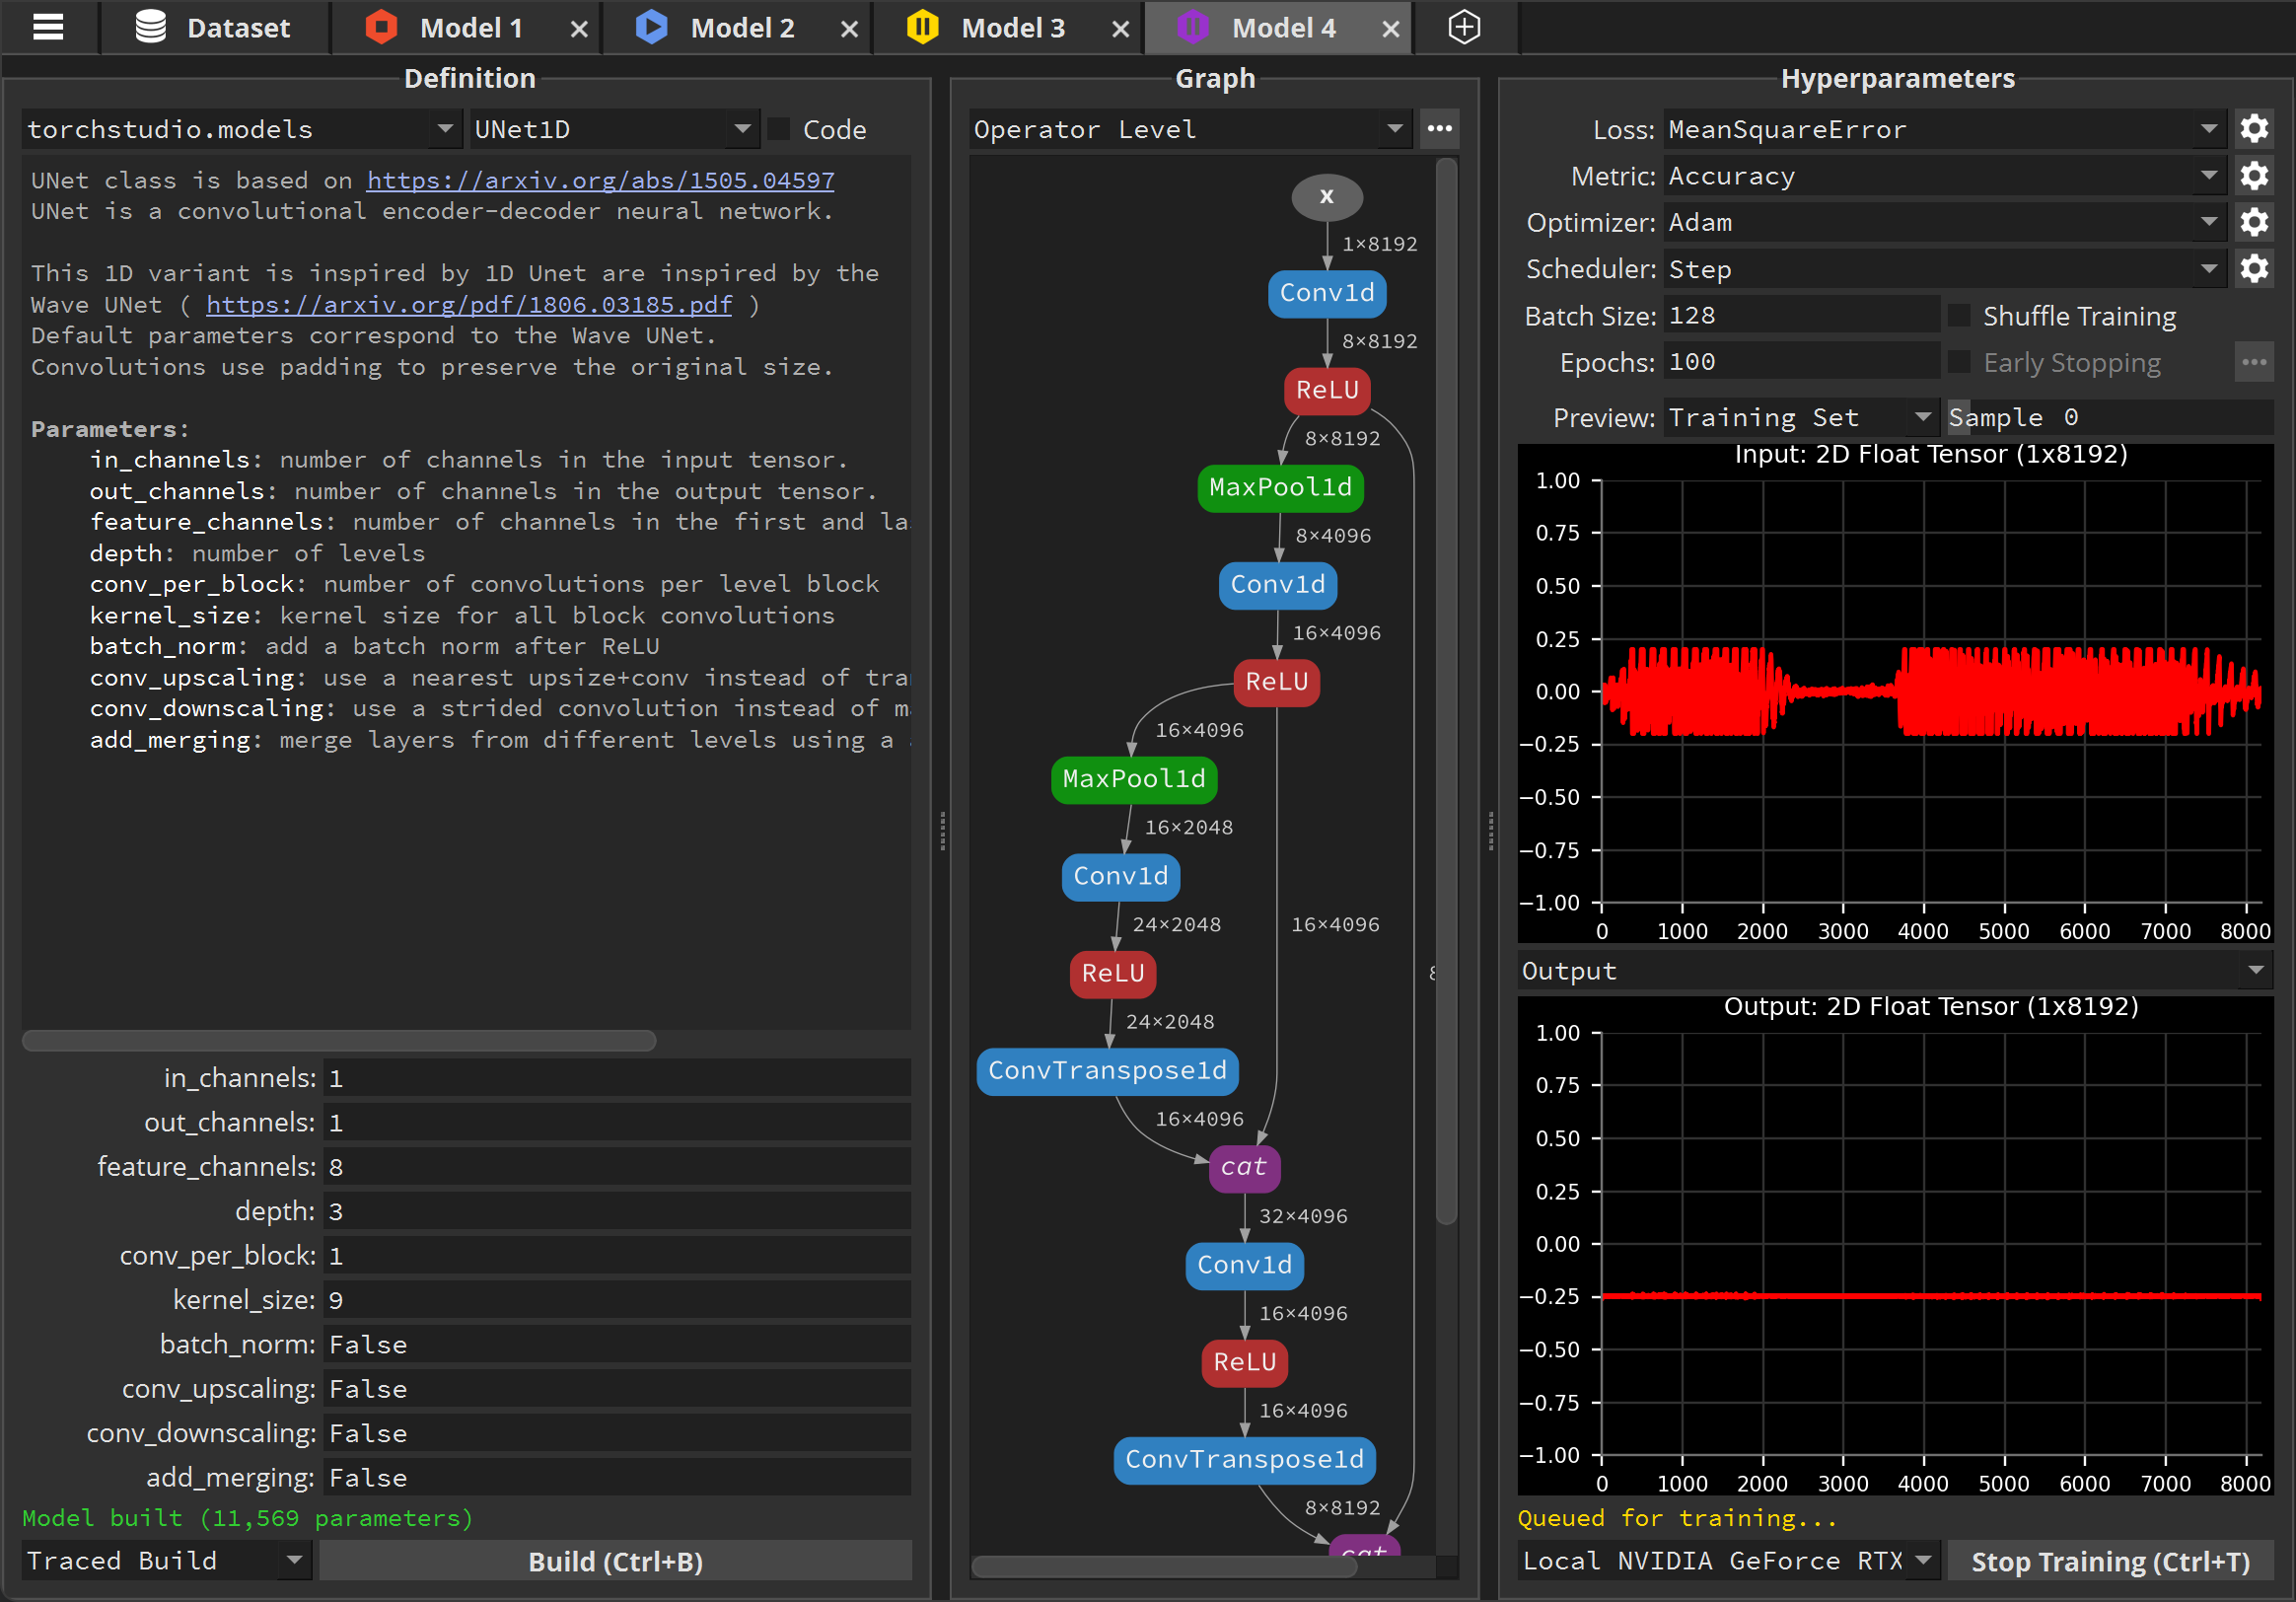
Set the customizable 1D UNet model
Click the  button at the top, next to the Dataset tab.
Select the torchstudio.models category, and the UNet1D model. We’ll start by defining our base parameters with minimal values.
Set feature_channels to 8, depth to 3 and kernel_size to 5.
Then Build the model.
In the Hyperparameters panel we’ll also customize the Metric: select Accuracy, then click the  button next to it.
This will display the Accuracy module settings.
button next to it.
This will display the Accuracy module settings.
Set the threshold to 0.01:
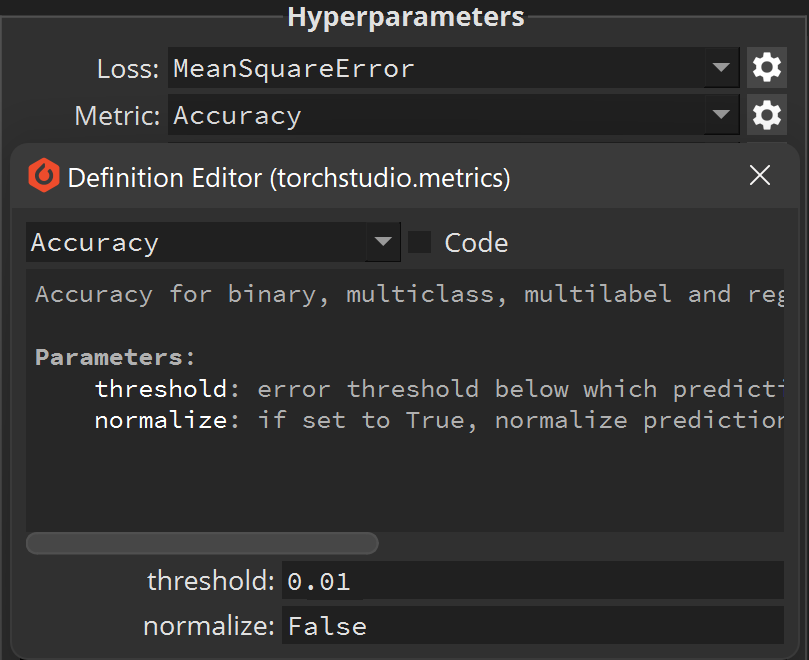
This will ensure our metric only consider predictions accuracte if the error between the Output (predicted) sample and the Target (original) sample is less than 0.01.
Then click Train. While this model is training, let’s create a new model tab.
Fine-tune the model
Click the button at the top, next to the Model 1 tab. This will create a copy of that model.
Set feature_channels to 16, depth to 3 and kernel_size to 5. Click Build and Train.
Now click the button again to make a third copy of that model.
Set feature_channels to 8, depth to 4 and kernel_size to 5. Click Build and Train.
Finally, click the button again to make a fourth copy.
Set feature_channels to 8, depth to 3, and kernel_size to 9. Click Build and Train.
You should now have 4 models training, or waiting to be trained:
You can see their state by looking at their icon in the tab bar at the top: a stop icon (square) indicates that the model has finished training or is idle, a play icon (triangle) that the model is currently training, and a pause icon (two vertical bars) that the model waits in queue to be trained.
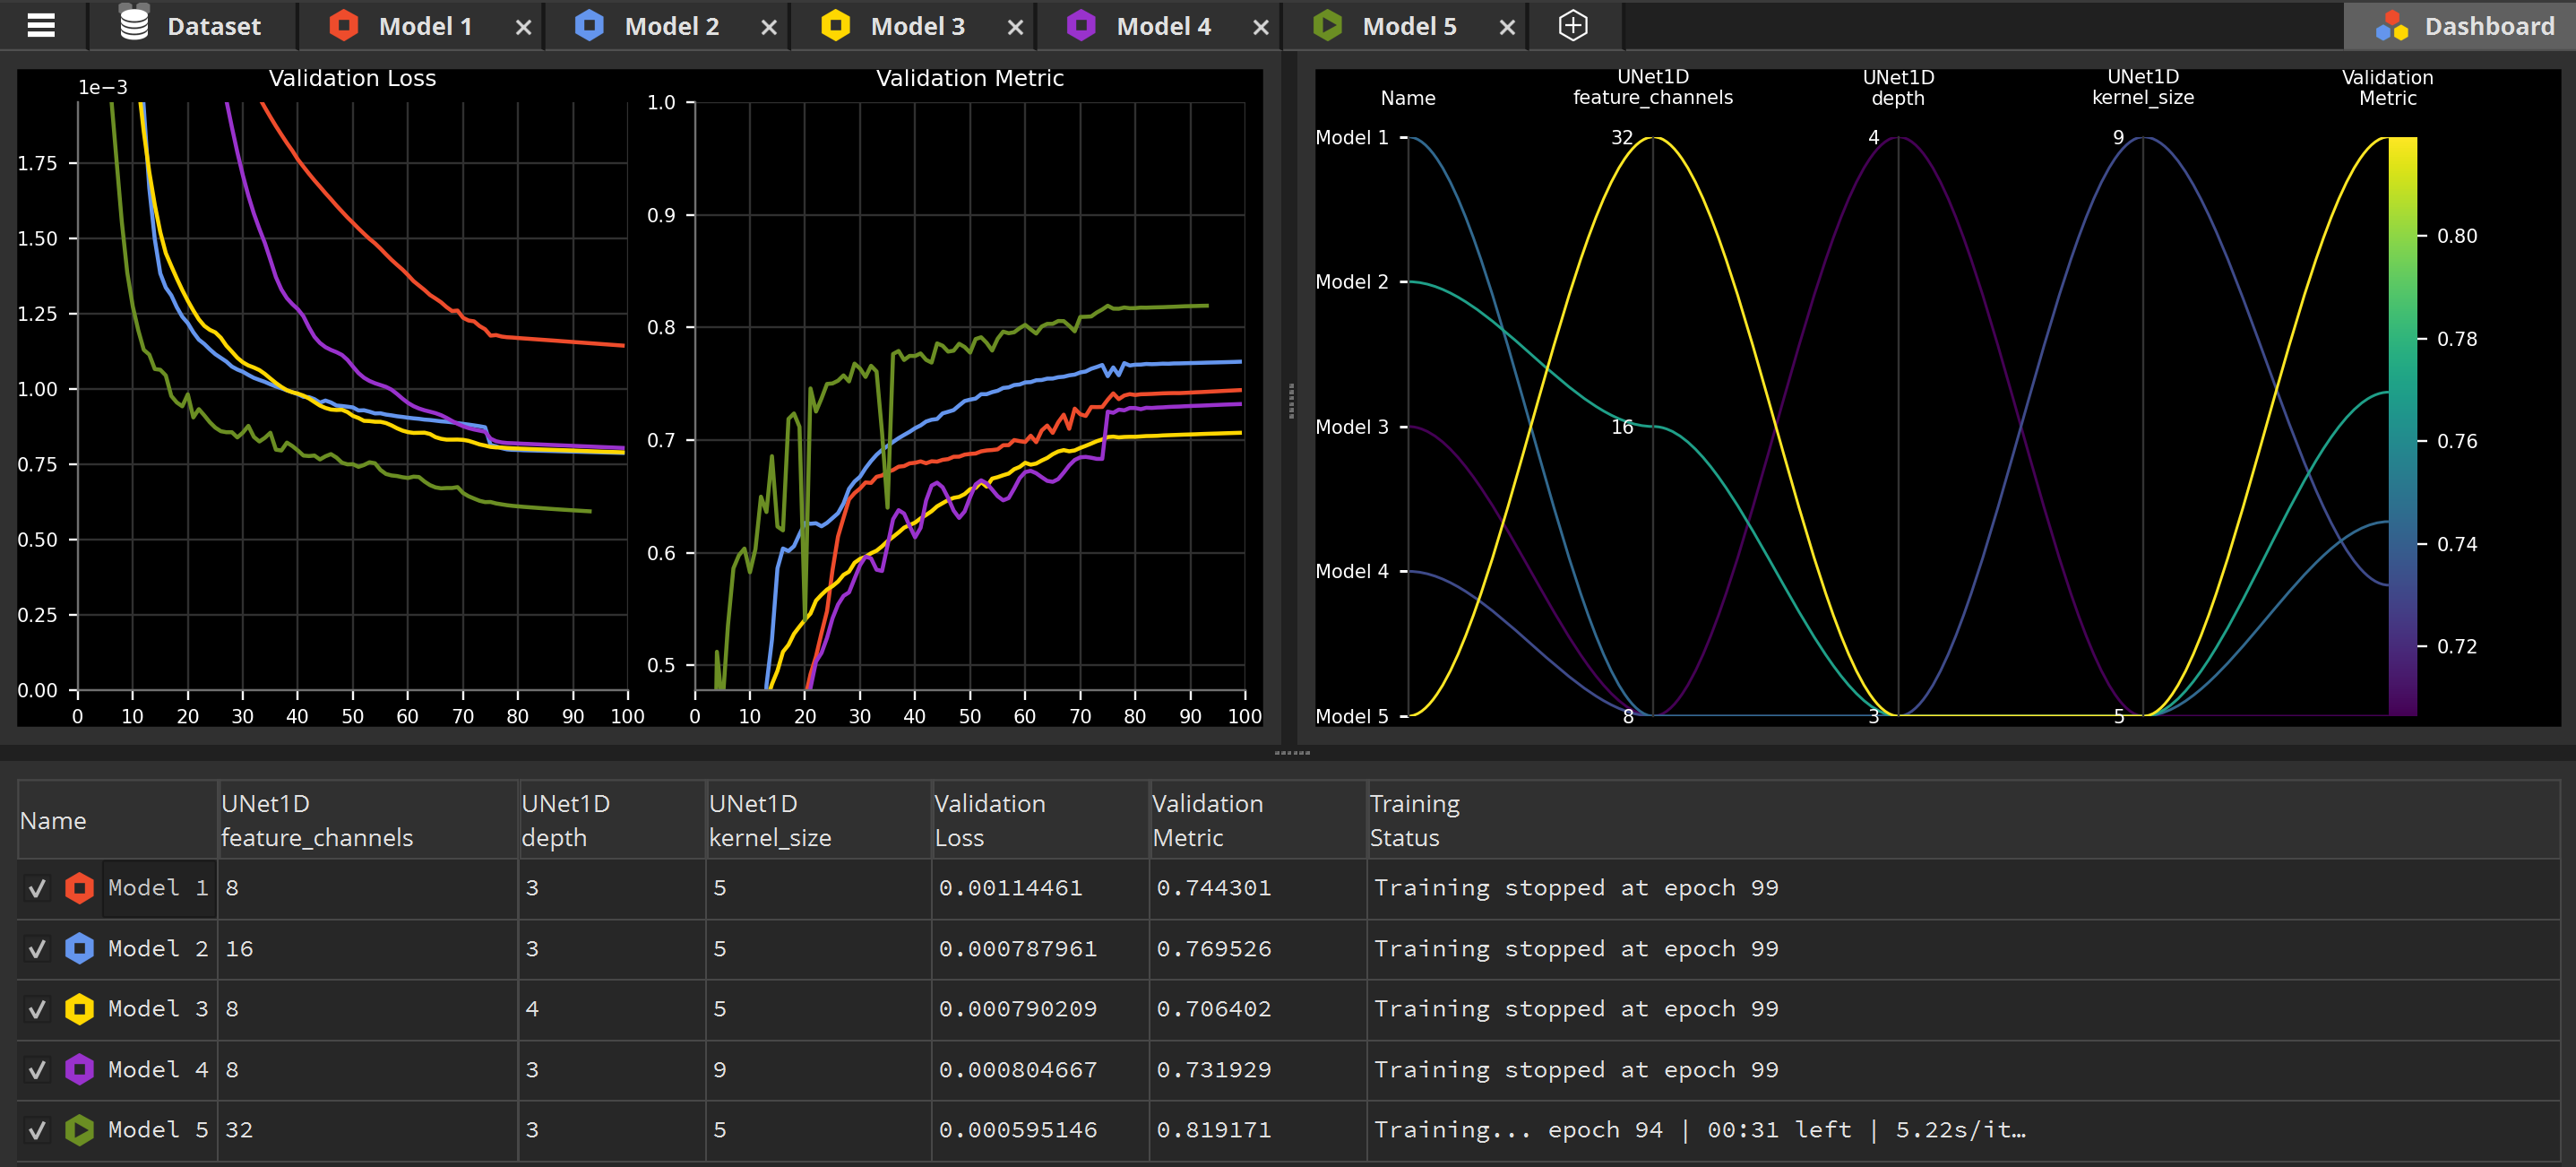
Identify the best parameters
While our models are training, we can monitor their progress and compare them in the Dashboard. It’s the last tab in the top-right corner of the application.
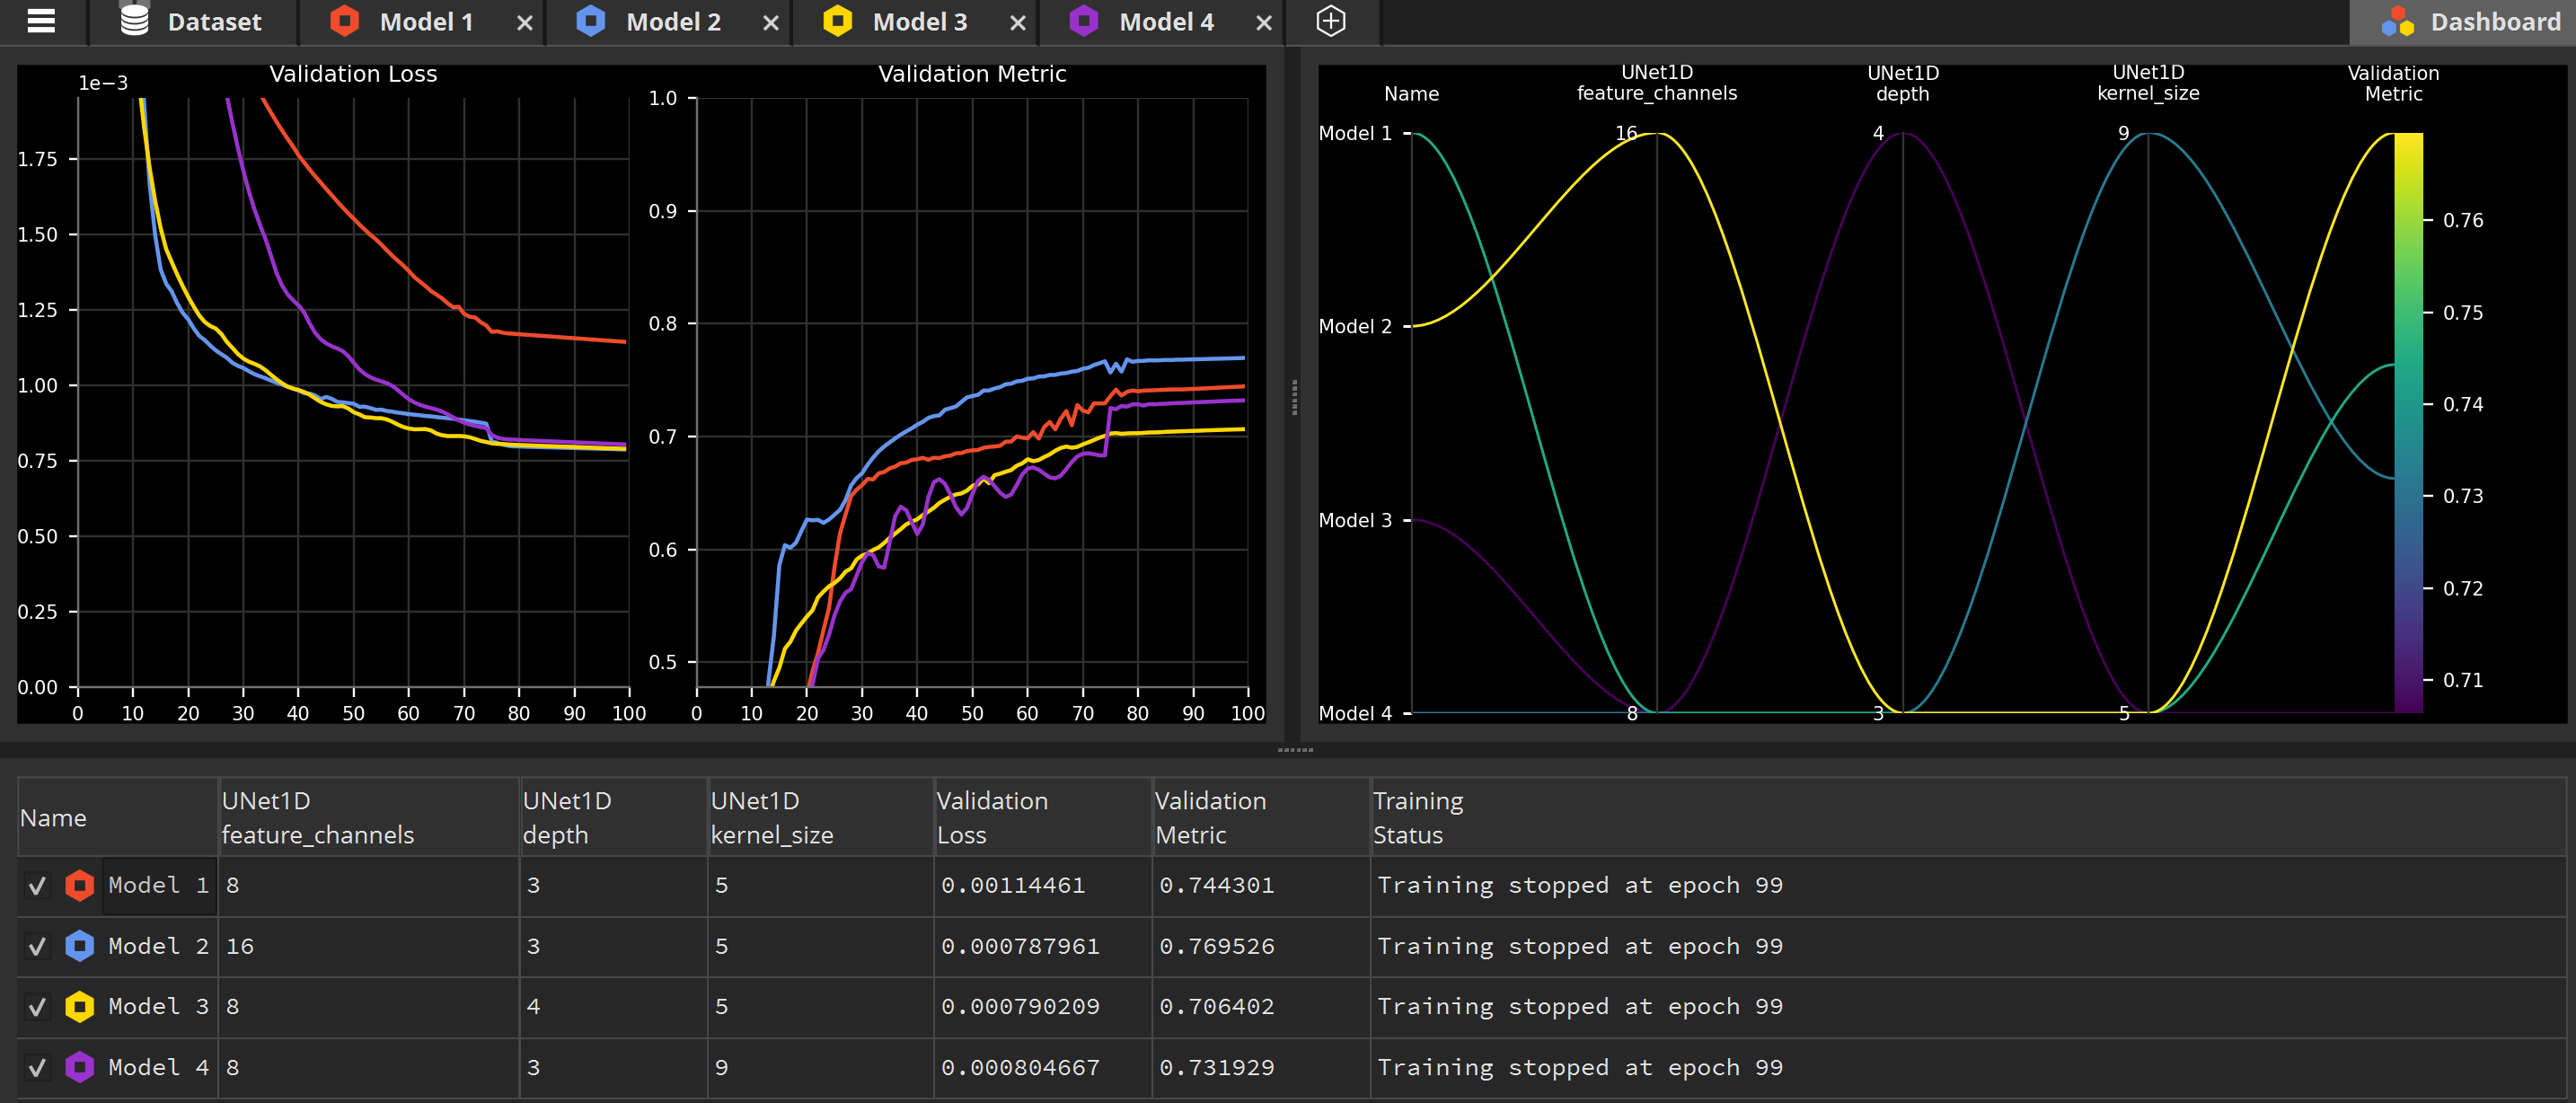
You can zoom in the Metrics using the mouse wheel to more easily differentiate the performances of the different models.
But more importantly, have a look at the Parameters Plot display at the top right: this display is designed to help you identify the best performing parameters. The brighter the lines, the better the validation metric.
Surprisingly, this display tells us one important thing: of all the parameters we’ve raised, only the feature_channels channel made a difference. Actually, raising the depth and kernel_size resulted in worst results than our minimal values model. So it looks like the feature_channels is the most important parameter to focus on to find the best performing model on this specific task.
And indeed, creating a fifth model based on Model 2 and doubling again the feature_channels value result in even higher performances for this task, reaching 82% of accuracy: