Prepare a remote server
On top of the local hardware, TorchStudio can use any remote SSH server as a storage or computation device.
Some SSH servers comes with Python 3.7 (or higher) and PyTorch 1.9 (or higher) pre-installed. Cloud services such as Amazon AWS, Microsoft Azure, Google Cloud or Paperspace offer such images.
If your SSH server doesn’t have such pre-installed environment, you can also let TorchStudio install it automatically.
To connect to a remote server TorchStudio needs the following infos:
- Address (public IP or domain)
- Port (usually 22 for SSH)
- Username
- Password and/or a key file
- Path to the Python interpreter if available, or let TorchStudio install and set a new Python environment.
Amazon AWS
EC2 > Instances > Launch instances > Amazon Machine Image
Image name: Deep Learning AMI (Ubuntu 18.04) Version 55.0
Address: public IP displayed after the virtual machine is created
Username: ubuntu
Key File: .pem file generated by AWS
Environment: /home/ubuntu/anaconda3/envs/pytorch_p38/bin/python
Image name: Deep Learning AMI GPU PyTorch 1.10.0 (Amazon Linux 2) 20211115
Address: public IP displayed after the virtual machine is created
Username: ec2-user
Key File: .pem file generated by AWS
Environment: /opt/conda/envs/pytorch/bin/python
Microsoft Azure
Virtual Machines > Create > Virtual Machine > Image
Image name: Data Science Virtual Machine - Ubuntu 18.04
Address: public IP displayed after the virtual machine is created
Username: azureuser (default username)
Key File: .pem file generated by Azure
Environment: /anaconda/envs/py38_pytorch/bin/python
Google Cloud
Compute Engine > VM Instances > Create Instance > Boot disk
Image name: Deep Learning on Linux > Debian 10 based Deep Learning VM for PyTorch CPU/GPU with CUDA 11.0 M88
Address: public IP displayed after the virtual machine is created
Username: (depends on your Google account)
Key File: file generated locally by the user and added to the server configuration
Environment: /opt/conda/bin/python
Paperspace
CORE Virtual Servers > Create A Machine
Image name: ML-in-a-Box
Address: public IP displayed after the virtual machine is created
Username: paperspace
Key File: file generated locally by the user and added to the server configuration
Environment: /usr/bin/python3
Add a remote server
Click  > Settings…
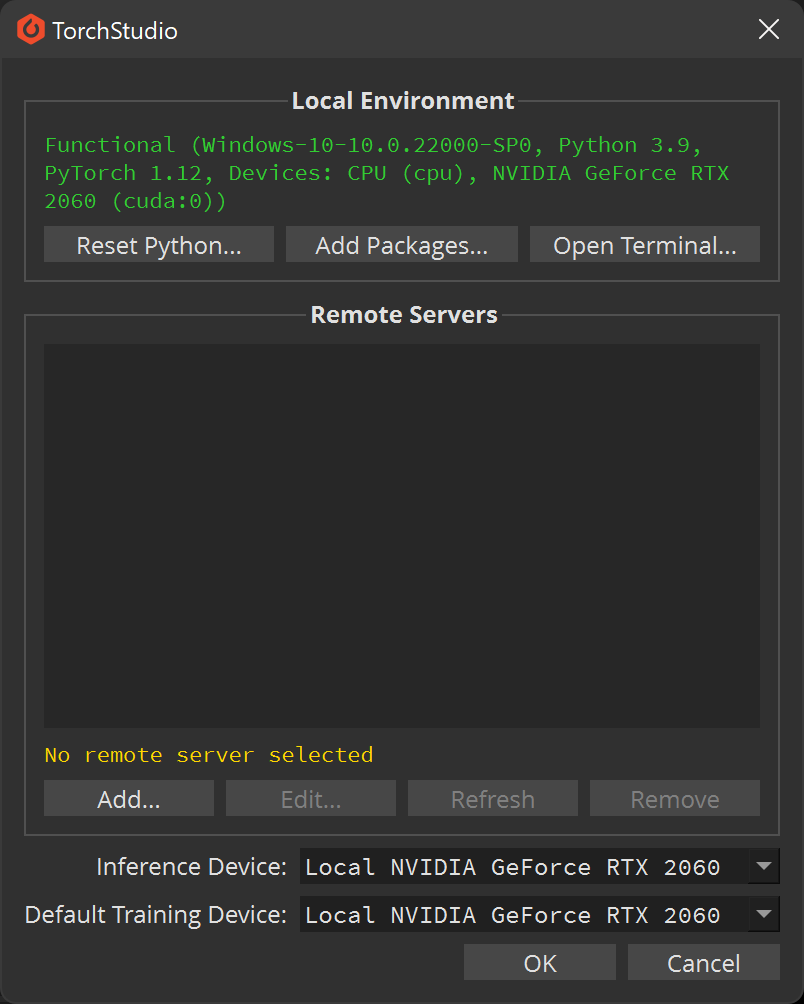
Then click Add… and fill the informations corresponding to your server:
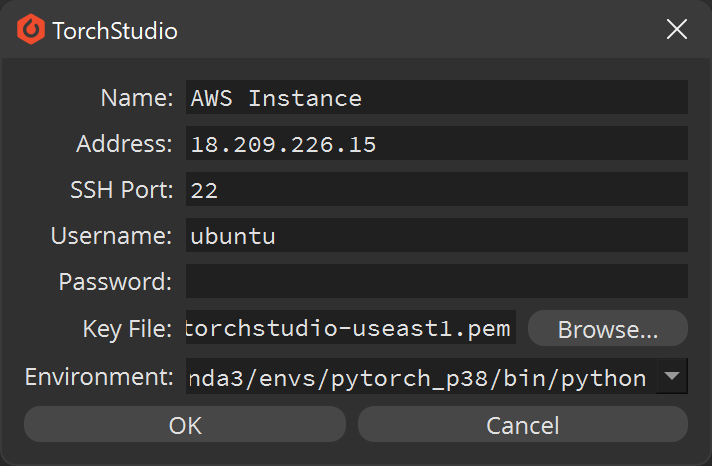
If you don’t have a pre-installed environment or don’t know that information, you can let TorchStudio install and set an environment for you.
Then click OK. TorchStudio will connect to the server and check it meets the requirements. If everything goes well you’ll see something like this:
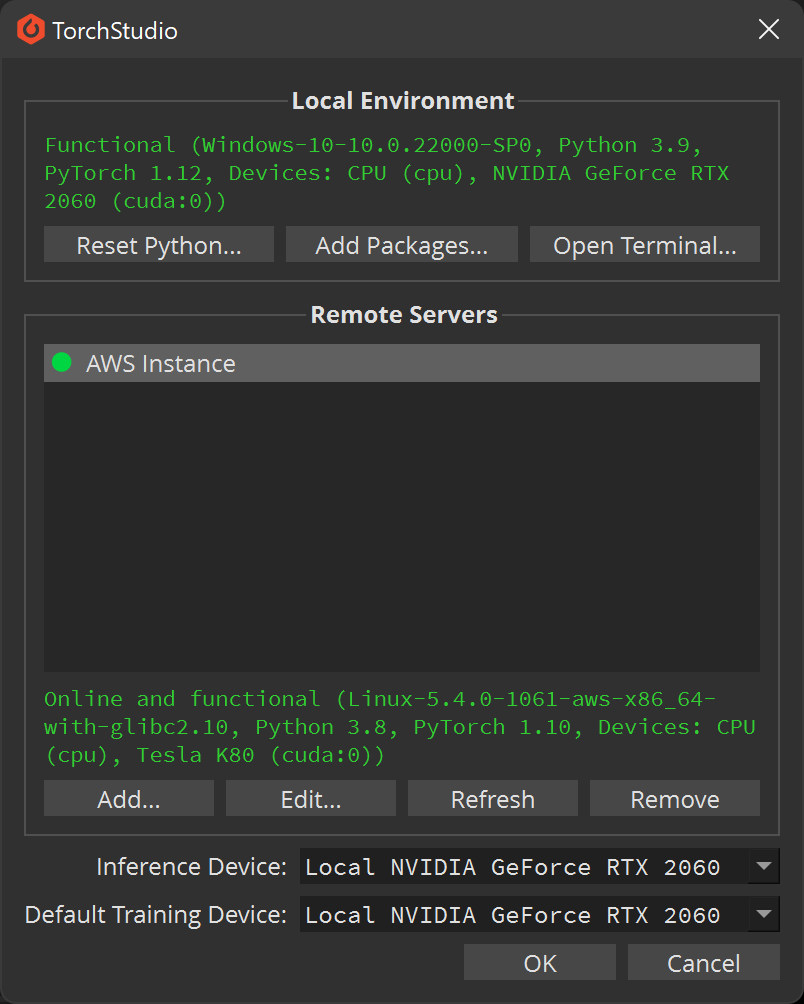
You can add as many different servers as you want, and their hardware and devices will be immediately available to TorchStudio. Click OK when you’re done adding servers.
Load a dataset on a remote server
If your dataset is stored remotely, or if the dataset can download its data (such as in the example below), you can specify to TorchStudio to load the dataset remotely. All you have to do is change the server next to the Load button before clicking it.
For example in the Dataset tab you can choose the torchvision.datasets category and the MNIST dataset, select your newly added server, and click Load.

All the samples will then be managed remotely.
Train a model on a remote server
Training a model remotely is as simple: simple choose the remote device you want to use next to the Train button before clicking it.
For example in a Model tab you can choose the torchvision.models category and the MNISTClassifier model, click Build, then select one of your newly added remote devices, and click Train.

NB: If both a remote dataset and remote training device are set, the remote dataset server will directly send the data to the remote training server without going through your computer. Just make sure the training server can accept connections from the dataset server ip.
Infer a model on a remote server
Finally, you can also use a remote server to infer a model, meaning getting output predictions for the displayed samples.
To use a remote server for inference, click > Settings… and change the Inference Device, then click OK to save the settings.
NB: It’s usually preferable to use local hardware for inference (specially if you have a local GPU), as this will cause less latency when previewing predictions.